💥 OpenAI Proxy Server
LiteLLM Server manages:
- Calling 100+ LLMs Huggingface/Bedrock/TogetherAI/etc. in the OpenAI
ChatCompletions&Completionsformat - Set custom prompt templates + model-specific configs (
temperature,max_tokens, etc.) - Routing between Multiple Models + Deployments of the same model
Quick Start
View all the supported args for the Proxy CLI here
$ litellm --model huggingface/bigcode/starcoder

#INFO: Proxy running on http://0.0.0.0:8000
Test
In a new shell, run, this will make an openai.chat.completions request. Ensure you're using openai v1.0.0+
litellm --test
This will now automatically route any requests for gpt-3.5-turbo to bigcode starcoder, hosted on huggingface inference endpoints.
Using LiteLLM Proxy - Curl Request, OpenAI Package
- Curl Request
- OpenAI v1.0.0+
curl --location 'http://0.0.0.0:8000/chat/completions' \
--header 'Content-Type: application/json' \
--data ' {
      "model": "gpt-3.5-turbo",
      "messages": [
        {
          "role": "user",
          "content": "what llm are you"
        }
      ],
    }
'
import openai
client = openai.OpenAI(
    api_key="anything",
    base_url="http://0.0.0.0:8000"
)

# request sent to model set on litellm proxy, `litellm --model`
response = client.chat.completions.create(model="gpt-3.5-turbo", messages = [
    {
        "role": "user",
        "content": "this is a test request, write a short poem"
    }
])

print(response)
Supported LLMs
- AWS Bedrock
- Azure OpenAI
- OpenAI
- Huggingface (TGI) Deployed
- Huggingface (TGI) Local
- AWS Sagemaker
- Anthropic
- VLLM
- TogetherAI
- Replicate
- Petals
- Palm
- AI21
- Cohere
$ export AWS_ACCESS_KEY_ID=
$ export AWS_REGION_NAME=
$ export AWS_SECRET_ACCESS_KEY=
$ litellm --model bedrock/anthropic.claude-v2
$ export AZURE_API_KEY=my-api-key
$ export AZURE_API_BASE=my-api-base
$ litellm --model azure/my-deployment-name
$ export OPENAI_API_KEY=my-api-key
$ litellm --model gpt-3.5-turbo
$ export HUGGINGFACE_API_KEY=my-api-key #[OPTIONAL]
$ litellm --model huggingface/<your model name> --api_base https://k58ory32yinf1ly0.us-east-1.aws.endpoints.huggingface.cloud
$ litellm --model huggingface/<your model name> --api_base http://0.0.0.0:8001
export AWS_ACCESS_KEY_ID=
export AWS_REGION_NAME=
export AWS_SECRET_ACCESS_KEY=
$ litellm --model sagemaker/jumpstart-dft-meta-textgeneration-llama-2-7b
$ export ANTHROPIC_API_KEY=my-api-key
$ litellm --model claude-instant-1
$ litellm --model vllm/facebook/opt-125m
$ export TOGETHERAI_API_KEY=my-api-key
$ litellm --model together_ai/lmsys/vicuna-13b-v1.5-16k
$ export REPLICATE_API_KEY=my-api-key
$ litellm \
  --model replicate/meta/llama-2-70b-chat:02e509c789964a7ea8736978a43525956ef40397be9033abf9fd2badfe68c9e3
$ litellm --model petals/meta-llama/Llama-2-70b-chat-hf
$ export PALM_API_KEY=my-palm-key
$ litellm --model palm/chat-bison
$ export AI21_API_KEY=my-api-key
$ litellm --model j2-light
$ export COHERE_API_KEY=my-api-key
$ litellm --model command-nightly
Server Endpoints
- POST
/chat/completions- chat completions endpoint to call 100+ LLMs - POST
/completions- completions endpoint - POST
/embeddings- embedding endpoint for Azure, OpenAI, Huggingface endpoints - GET
/models- available models on server
Using with OpenAI compatible projects
LiteLLM allows you to set openai.api_base to the proxy server and use all LiteLLM supported LLMs in any OpenAI supported project
- LM-Harness Evals
- FLASK Evals
- Fast Eval
- ML Flow Eval
- ContinueDev
- Aider
- AutoGen
- guidance
NOTE: LM Harness has not updated to using openai 1.0.0+, in order to deal with this we will run lm harness in a venv
Step 1: Start the local proxy see supported models here
$ litellm --model huggingface/bigcode/starcoder
Using a custom api base
$ export HUGGINGFACE_API_KEY=my-api-key #[OPTIONAL]
$ litellm --model huggingface/tinyllama --api_base https://k58ory32yinf1ly0.us-east-1.aws.endpoints.huggingface.cloud
OpenAI Compatible Endpoint at http://0.0.0.0:8000
Step 2: Create a Virtual Env for LM Harness + Use OpenAI 0.28.1 We will now run lm harness with a new virtual env with openai==0.28.1
python3 -m venv lmharness
source lmharness/bin/activate
Pip install openai==0.28.01 in the venv
pip install openai==0.28.01
Step 3: Set OpenAI API Base & Key
$ export OPENAI_API_BASE=http://0.0.0.0:8000
LM Harness requires you to set an OpenAI API key OPENAI_API_SECRET_KEY for running benchmarks
export OPENAI_API_SECRET_KEY=anything
Step 4: Run LM-Eval-Harness
cd lm-evaluation-harness
pip install lm harness dependencies in venv
python3 -m pip install -e .
python3 -m lm_eval \
  --model openai-completions \
  --model_args engine=davinci \
  --task crows_pairs_english_age
Step 1: Start the local proxy
$ litellm --model huggingface/bigcode/starcoder
Step 2: Set OpenAI API Base & Key
$ export OPENAI_API_BASE=http://0.0.0.0:8000
Step 3 Run with FLASK
git clone https://github.com/kaistAI/FLASK
cd FLASK/gpt_review
Run the eval
python gpt4_eval.py -q '../evaluation_set/flask_evaluation.jsonl'
Step 1: Start the local proxy see supported models here
$ litellm --model huggingface/bigcode/starcoder
Step 2: Set OpenAI API Base & Key
$ export OPENAI_API_BASE=http://0.0.0.0:8000
Set this to anything since the proxy has the credentials
export OPENAI_API_KEY=anything
Step 3 Run with FastEval
Clone FastEval
# Clone this repository, make it the current working directory
git clone --depth 1 https://github.com/FastEval/FastEval.git
cd FastEval
Set API Base on FastEval
On FastEval make the following 2 line code change to set OPENAI_API_BASE
https://github.com/FastEval/FastEval/pull/90/files
try:
    api_base = os.environ["OPENAI_API_BASE"] #changed: read api base from .env
    if api_base == None:
        api_base = "https://api.openai.com/v1"
    response = await self.reply_two_attempts_with_different_max_new_tokens(
        conversation=conversation,
        api_base=api_base, # #changed: pass api_base
        api_key=os.environ["OPENAI_API_KEY"],
        temperature=temperature,
        max_new_tokens=max_new_tokens,
Run FastEval
Set -b to the benchmark you want to run. Possible values are mt-bench, human-eval-plus, ds1000, cot, cot/gsm8k, cot/math, cot/bbh, cot/mmlu and custom-test-data
Since LiteLLM provides an OpenAI compatible proxy -t and -m don't need to change
-t will remain openai
-m will remain gpt-3.5
./fasteval -b human-eval-plus -t openai -m gpt-3.5-turbo
MLflow provides an API mlflow.evaluate() to help evaluate your LLMs https://mlflow.org/docs/latest/llms/llm-evaluate/index.html
Pre Requisites
pip install litellm
pip install mlflow
Step 1: Start LiteLLM Proxy on the CLI
LiteLLM allows you to create an OpenAI compatible server for all supported LLMs. More information on litellm proxy here
$ litellm --model huggingface/bigcode/starcoder

#INFO: Proxy running on http://0.0.0.0:8000
Step 2: Run ML Flow
Before running the eval we will set openai.api_base to the litellm proxy from Step 1
openai.api_base = "http://0.0.0.0:8000"
import openai
import pandas as pd
openai.api_key = "anything"             # this can be anything, we set the key on the proxy
openai.api_base = "http://0.0.0.0:8000" # set api base to the proxy from step 1


import mlflow
eval_data = pd.DataFrame(
    {
        "inputs": [
            "What is the largest country",
            "What is the weather in sf?",
        ],
        "ground_truth": [
            "India is a large country",
            "It's cold in SF today"
        ],
    }
)

with mlflow.start_run() as run:
    system_prompt = "Answer the following question in two sentences"
    logged_model_info = mlflow.openai.log_model(
        model="gpt-3.5",
        task=openai.ChatCompletion,
        artifact_path="model",
        messages=[
            {"role": "system", "content": system_prompt},
            {"role": "user", "content": "{question}"},
        ],
    )

    # Use predefined question-answering metrics to evaluate our model.
    results = mlflow.evaluate(
        logged_model_info.model_uri,
        eval_data,
        targets="ground_truth",
        model_type="question-answering",
    )
    print(f"See aggregated evaluation results below: \n{results.metrics}")

    # Evaluation result for each data record is available in `results.tables`.
    eval_table = results.tables["eval_results_table"]
    print(f"See evaluation table below: \n{eval_table}")
Continue-Dev brings ChatGPT to VSCode. See how to install it here.
In the config.py set this as your default model.
  default=OpenAI(
      api_key="IGNORED",
      model="fake-model-name",
      context_length=2048, # customize if needed for your model
      api_base="http://localhost:8000" # your proxy server url
  ),
Credits @vividfog for this tutorial.
$ pip install aider

$ aider --openai-api-base http://0.0.0.0:8000 --openai-api-key fake-key
pip install pyautogen
from autogen import AssistantAgent, UserProxyAgent, oai
config_list=[
    {
        "model": "my-fake-model",
        "api_base": "http://localhost:8000",  #litellm compatible endpoint
        "api_type": "open_ai",
        "api_key": "NULL", # just a placeholder
    }
]

response = oai.Completion.create(config_list=config_list, prompt="Hi")
print(response) # works fine

llm_config={
    "config_list": config_list,
}

assistant = AssistantAgent("assistant", llm_config=llm_config)
user_proxy = UserProxyAgent("user_proxy")
user_proxy.initiate_chat(assistant, message="Plot a chart of META and TESLA stock price change YTD.", config_list=config_list)
Credits @victordibia for this tutorial.
NOTE: Guidance sends additional params like stop_sequences which can cause some models to fail if they don't support it.
Fix: Start your proxy using the --drop_params flag
litellm --model ollama/codellama --temperature 0.3 --max_tokens 2048 --drop_params
import guidance

# set api_base to your proxy
# set api_key to anything
gpt4 = guidance.llms.OpenAI("gpt-4", api_base="http://0.0.0.0:8000", api_key="anything")

experts = guidance('''
{{#system~}}
You are a helpful and terse assistant.
{{~/system}}

{{#user~}}
I want a response to the following question:
{{query}}
Name 3 world-class experts (past or present) who would be great at answering this?
Don't answer the question yet.
{{~/user}}

{{#assistant~}}
{{gen 'expert_names' temperature=0 max_tokens=300}}
{{~/assistant}}
''', llm=gpt4)

result = experts(query='How can I be more productive?')
print(result)
Proxy Configs
The Config allows you to set the following params
| Param Name | Description |
|---|---|
model_list | List of supported models on the server, with model-specific configs |
litellm_settings | litellm Module settings, example litellm.drop_params=True, litellm.set_verbose=True, litellm.api_base |
general_settings | Server settings, example setting master_key: sk-my_special_key |
Example Config
model_list:
  - model_name: zephyr-alpha
    litellm_params: # params for litellm.completion() - https://docs.litellm.ai/docs/completion/input#input---request-body
      model: huggingface/HuggingFaceH4/zephyr-7b-alpha
      api_base: http://0.0.0.0:8001
  - model_name: zephyr-beta
    litellm_params:
      model: huggingface/HuggingFaceH4/zephyr-7b-beta
      api_base: https://<my-hosted-endpoint>

litellm_settings:
  drop_params: True
  set_verbose: True

general_settings:
  master_key: sk-1234 # [OPTIONAL] Only use this if you to require all calls to contain this key (Authorization: Bearer sk-1234)
Multiple Models
Here's how you can use multiple llms with one proxy config.yaml.
Step 1: Setup Config
model_list:
  - model_name: zephyr-alpha # the 1st model is the default on the proxy
    litellm_params: # params for litellm.completion() - https://docs.litellm.ai/docs/completion/input#input---request-body
      model: huggingface/HuggingFaceH4/zephyr-7b-alpha
      api_base: http://0.0.0.0:8001
  - model_name: gpt-4
    litellm_params:
      model: gpt-4
      api_key: sk-1233
  - model_name: claude-2
    litellm_params:
      model: claude-2
      api_key: sk-claude
The proxy uses the first model in the config as the default model - in this config the default model is zephyr-alpha
Step 2: Start Proxy with config
$ litellm --config /path/to/config.yaml
Step 3: Use proxy
Curl Command
curl --location 'http://0.0.0.0:8000/chat/completions' \
--header 'Content-Type: application/json' \
--data ' {
      "model": "zephyr-alpha",
      "messages": [
        {
          "role": "user",
          "content": "what llm are you"
        }
      ],
    }
'
Managing Auth - Virtual Keys
Grant other's temporary access to your proxy, with keys that expire after a set duration.
Requirements:
- Need to a postgres database (e.g. Supabase)
You can then generate temporary keys by hitting the /key/generate endpoint.
Step 1: Save postgres db url
model_list:
  - model_name: gpt-4
    litellm_params:
        model: ollama/llama2
  - model_name: gpt-3.5-turbo
    litellm_params:
        model: ollama/llama2

general_settings:
  master_key: sk-1234 # [OPTIONAL] if set all calls to proxy will require either this key or a valid generated token
  database_url: "postgresql://<user>:<password>@<host>:<port>/<dbname>"
Step 2: Start litellm
litellm --config /path/to/config.yaml
Step 3: Generate temporary keys
curl 'http://0.0.0.0:8000/key/generate' \
--h 'Authorization: Bearer sk-1234' \
--d '{"models": ["gpt-3.5-turbo", "gpt-4", "claude-2"], "duration": "20m"}'
models: list or null (optional) - Specify the models a token has access too. If null, then token has access to all models on server.duration: str or null (optional) Specify the length of time the token is valid for. If null, default is set to 1 hour. You can set duration as seconds ("30s"), minutes ("30m"), hours ("30h"), days ("30d").
Expected response:
{
    "key": "sk-kdEXbIqZRwEeEiHwdg7sFA", # Bearer token
    "expires": "2023-11-19T01:38:25.838000+00:00" # datetime object
}
Save Model-specific params (API Base, API Keys, Temperature, Headers etc.)
You can use the config to save model-specific information like api_base, api_key, temperature, max_tokens, etc.
Step 1: Create a config.yaml file
model_list:
  - model_name: gpt-4-team1
    litellm_params: # params for litellm.completion() - https://docs.litellm.ai/docs/completion/input#input---request-body
      model: azure/chatgpt-v-2
      api_base: https://openai-gpt-4-test-v-1.openai.azure.com/
      api_version: "2023-05-15"
      azure_ad_token: eyJ0eXAiOiJ
  - model_name: gpt-4-team2
    litellm_params:
      model: azure/gpt-4
      api_key: sk-123
      api_base: https://openai-gpt-4-test-v-2.openai.azure.com/
  - model_name: mistral-7b
    litellm_params:
      model: ollama/mistral
      api_base: your_ollama_api_base
      headers: {
        "HTTP-Referer": "litellm.ai",
        "X-Title": "LiteLLM Server"
      }
Step 2: Start server with config
$ litellm --config /path/to/config.yaml
Model Alias
Set a model alias for your deployments.
In the config.yaml the model_name parameter is the user-facing name to use for your deployment.
In the config below requests with model=gpt-4 will route to ollama/zephyr
model_list:
  - model_name: text-davinci-003
    litellm_params:
        model: ollama/zephyr
  - model_name: gpt-4
    litellm_params:
        model: ollama/llama2
  - model_name: gpt-3.5-turbo
    litellm_params:
        model: ollama/llama2
Multiple Instances of 1 model
If you have multiple instances of the same model,
in the config.yaml just add all of them with the same 'model_name', and the proxy will handle routing requests (using LiteLLM's Router).
In the config below requests with model=zephyr-beta will be routed across multiple instances of HuggingFaceH4/zephyr-7b-beta
model_list:
  - model_name: zephyr-beta
    litellm_params:
        model: huggingface/HuggingFaceH4/zephyr-7b-beta
        api_base: http://0.0.0.0:8001
  - model_name: zephyr-beta
    litellm_params:
        model: huggingface/HuggingFaceH4/zephyr-7b-beta
        api_base: http://0.0.0.0:8002
  - model_name: zephyr-beta
    litellm_params:
        model: huggingface/HuggingFaceH4/zephyr-7b-beta
        api_base: http://0.0.0.0:8003
Step 2: Start Proxy with config
$ litellm --config /path/to/config.yaml
Step 3: Use proxy
Curl Command
curl --location 'http://0.0.0.0:8000/chat/completions' \
--header 'Content-Type: application/json' \
--data ' {
      "model": "zephyr-beta",
      "messages": [
        {
          "role": "user",
          "content": "what llm are you"
        }
      ],
    }
'
Set Custom Prompt Templates
LiteLLM by default checks if a model has a prompt template and applies it (e.g. if a huggingface model has a saved chat template in it's tokenizer_config.json). However, you can also set a custom prompt template on your proxy in the config.yaml:
Step 1: Save your prompt template in a config.yaml
# Model-specific parameters
model_list:
  - model_name: mistral-7b # model alias
    litellm_params: # actual params for litellm.completion()
      model: "huggingface/mistralai/Mistral-7B-Instruct-v0.1"
      api_base: "<your-api-base>"
      api_key: "<your-api-key>" # [OPTIONAL] for hf inference endpoints
      initial_prompt_value: "\n"
      roles: {"system":{"pre_message":"<|im_start|>system\n", "post_message":"<|im_end|>"}, "assistant":{"pre_message":"<|im_start|>assistant\n","post_message":"<|im_end|>"}, "user":{"pre_message":"<|im_start|>user\n","post_message":"<|im_end|>"}}
      final_prompt_value: "\n"
      bos_token: "<s>"
      eos_token: "</s>"
      max_tokens: 4096
Step 2: Start server with config
$ litellm --config /path/to/config.yaml
Debugging Proxy
Run the proxy with --debug to easily view debug logs
litellm --model gpt-3.5-turbo --debug
When making requests you should see the POST request sent by LiteLLM to the LLM on the Terminal output
POST Request Sent from LiteLLM:
curl -X POST \
https://api.openai.com/v1/chat/completions \
-H 'content-type: application/json' -H 'Authorization: Bearer sk-qnWGUIW9****************************************' \
-d '{"model": "gpt-3.5-turbo", "messages": [{"role": "user", "content": "this is a test request, write a short poem"}]}'
Logging Proxy Input/Output - Langfuse
We will use the --config to set litellm.success_callback = ["langfuse"] this will log all successfull LLM calls to langfuse
Step 1 Install langfuse
pip install langfuse
Step 2: Create a config.yaml file and set litellm_settings: success_callback
model_list:
 - model_name: gpt-3.5-turbo
    litellm_params:
      model: gpt-3.5-turbo
litellm_settings:
  success_callback: ["langfuse"]
Step 3: Start the proxy, make a test request
Start proxy
litellm --config config.yaml --debug
Test Request
litellm --test
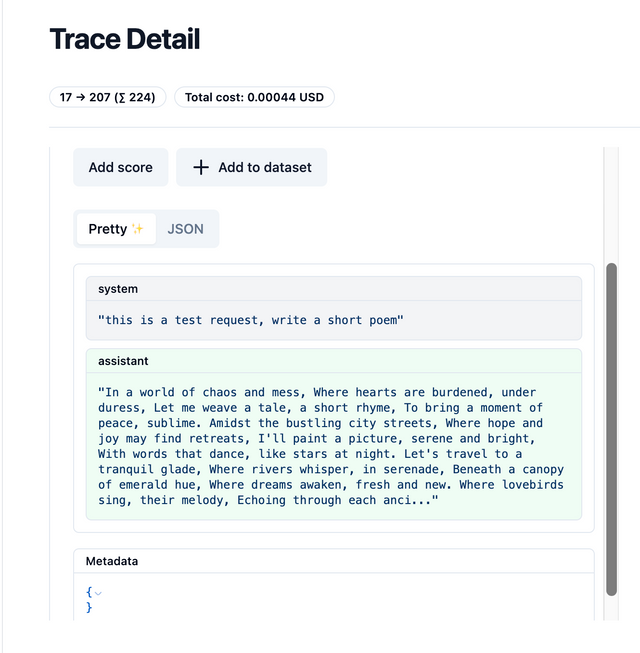
Expected output on Langfuse
Proxy CLI Arguments
--host
- Default:
'0.0.0.0' - The host for the server to listen on.
- Usage:
litellm --host 127.0.0.1
--port
- Default:
8000 - The port to bind the server to.
- Usage:
litellm --port 8080
--num_workers
- Default:
1 - The number of uvicorn workers to spin up.
- Usage:
litellm --num_workers 4
--api_base
- Default:
None - The API base for the model litellm should call.
- Usage:
litellm --model huggingface/tinyllama --api_base https://k58ory32yinf1ly0.us-east-1.aws.endpoints.huggingface.cloud
--api_version
- Default:
None - For Azure services, specify the API version.
- Usage:
litellm --model azure/gpt-deployment --api_version 2023-08-01 --api_base https://<your api base>"
--model or -m
- Default:
None - The model name to pass to Litellm.
- Usage:
litellm --model gpt-3.5-turbo
--test
- Type:
bool(Flag) - Proxy chat completions URL to make a test request.
- Usage:
litellm --test
--alias
- Default:
None - An alias for the model, for user-friendly reference.
- Usage:
litellm --alias my-gpt-model
--debug
- Default:
False - Type:
bool(Flag) - Enable debugging mode for the input.
- Usage:
litellm --debug
--temperature
- Default:
None - Type:
float - Set the temperature for the model.
- Usage:
litellm --temperature 0.7
--max_tokens
- Default:
None - Type:
int - Set the maximum number of tokens for the model output.
- Usage:
litellm --max_tokens 50
--request_timeout
- Default:
600 - Type:
int - Set the timeout in seconds for completion calls.
- Usage:
litellm --request_timeout 300
--drop_params
- Type:
bool(Flag) - Drop any unmapped params.
- Usage:
litellm --drop_params
--add_function_to_prompt
- Type:
bool(Flag) - If a function passed but unsupported, pass it as a part of the prompt.
- Usage:
litellm --add_function_to_prompt
--config
- Configure Litellm by providing a configuration file path.
- Usage:
litellm --config path/to/config.yaml
--telemetry
- Default:
True - Type:
bool - Help track usage of this feature.
- Usage:
litellm --telemetry False